LTI User Sync
How Are Users Synced Between Canvas and the Cyber Range?
After establishing integration between the Cyber Range and Canvas, any existing students and TAs will be removed from your Cyber Range course and replaced with your Canvas users. Any new users can be added directly to Canvas, which will be synced with the Cyber Range daily. Additionally, instructors can manually run a sync at any time.
User Mapping
When users are imported from Canvas, they will be assigned the corresponding roles in the Cyber Range. Displayed below is a mapping of user roles from Canvas to the Cyber Range:
| Canvas Role | Cyber Range Role |
|---|---|
| Teacher | Instructor |
| Student | Student |
| TA | TA |
| Designer | No Access |
| Observer | No Access |
This table includes all of the official user types provided in Canvas. Please reach out to your Canvas administrator if you have any questions about other custom roles.
Managing User Sync
Note
The screenshots in this section are based on a Canvas integration using the Public Privacy Level.
In the list of fields, setting the "Privacy Level" to Public will display the Canvas users' names and emails in the Cyber Range. Setting the "Privacy Level" to Private will assign randomly generated names (such as "Curious Penguin 13") to users to display in the Cyber Range instead.
From the Cyber Range interface, course instructors have multiple tools to help them manage and review user synchronization. We will discuss those tools below.
Viewing Sync Results
To view the result of previous user sync events, you can do the following:
-
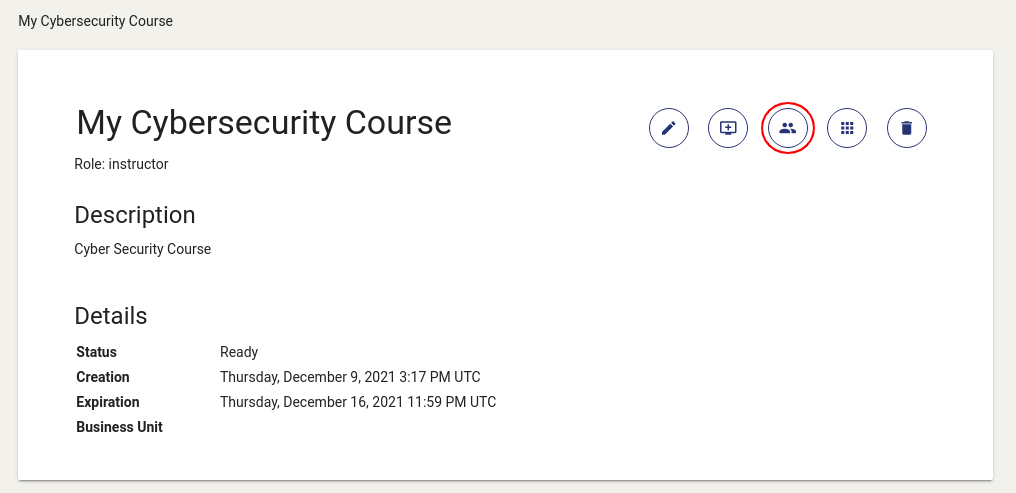
Navigate to any course with an active LTI integration.
-
Click on the Manage Course Users button to navigate to the Users page.
-
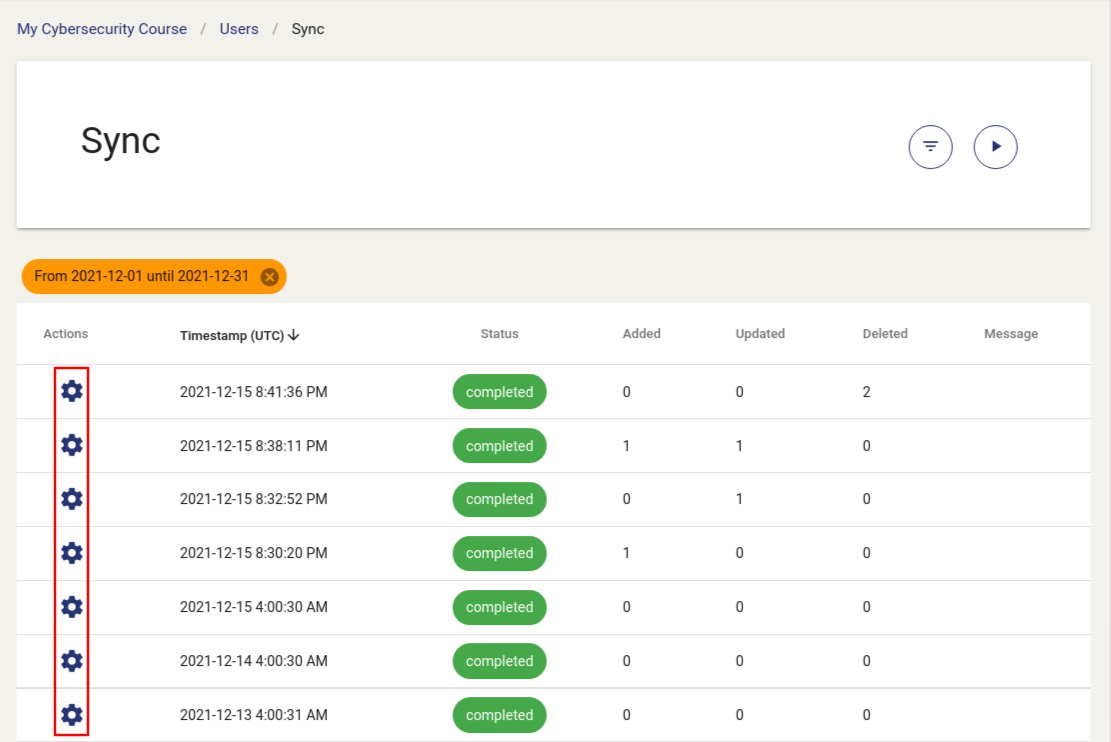
Click on the Sync Users button to navigate to the Sync page. The Sync page displays information regarding which users were added, removed, or updated by all Sync events.

-
To get a closer look at a specific Sync event, click the gear icon in the first column of the Sync event that you would like to review.
-
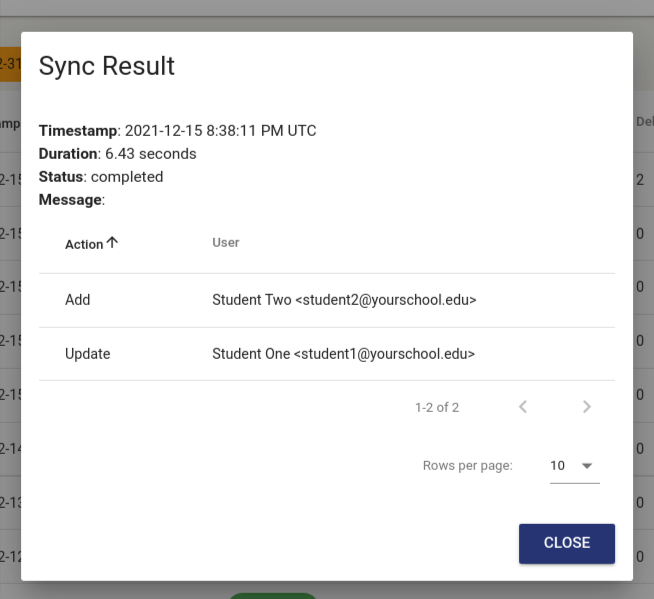
Select View to display the Sync Result dialog.
Manually Starting a User Sync
Note
LTI users are automatically synced daily. Manual sync is only required if your users need to be synced immediately.
If you make changes to your student roster in Canvas and want to update the user records in the Cyber Range immediately, please follow the steps below to conduct a manual user sync:
-
Navigate to any course with an active LTI integration.
-
Click on the Manage Course Users button to navigate to the Users page.
-
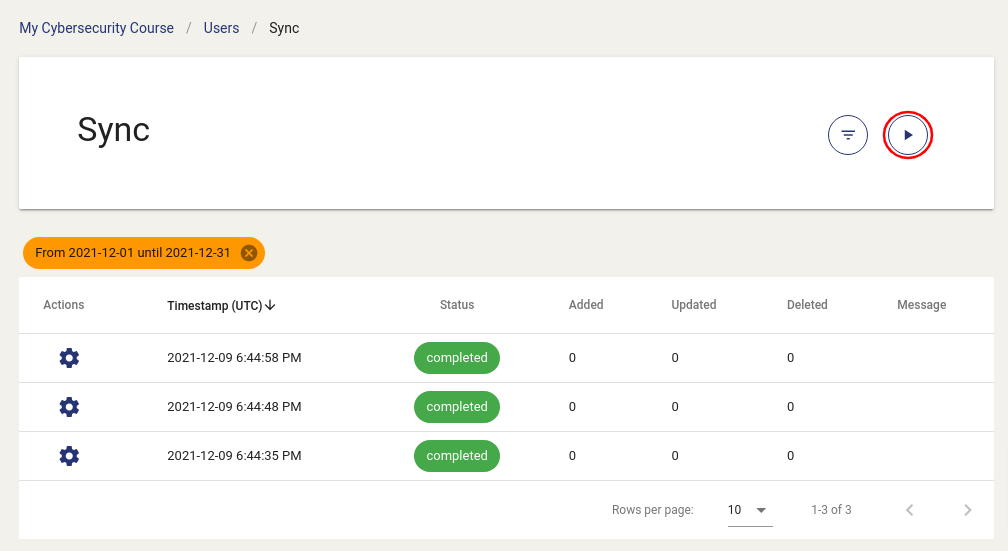
Click on the Sync Users button to navigate to the Sync page.
-
Click the Sync Now button denoted by a play button icon.
Have a Question? Contact Support
We're here to help you. If you still have questions after reviewing the information above, please feel free to submit a ticket with our Support Team and we'll get back to you as soon as possible.
Thank You for Your Feedback!